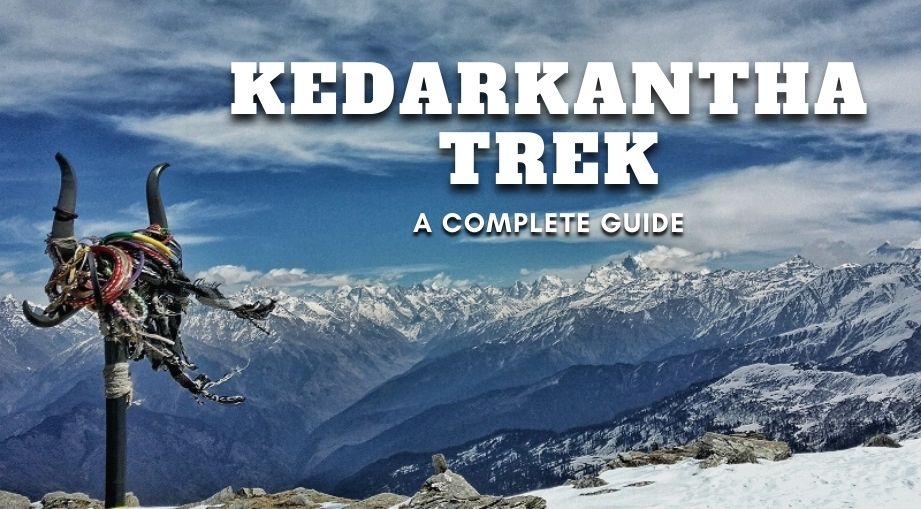
Are you looking for some crazy mountain adventure in life but afraid of tough hikes? Here is Kedarkantha trek for you.
Kedarkantha is one such trek with moderate difficulty that you can complete all year round. This is one of the most loved real and accessible winter hikes in India.
It’s a 4-day adventurous experience perfect for those who want to begin their trekking journey. Also, for those looking for a complete mountain experience, Kedarkantha is an all-in-one package. Right from walking on the snowy roads to the life inside the mountains, you will always be in action and enjoy every moment.
As I mentioned, you can do this in any season. Yes, even inside the dark winter.
Kedarkantha is an ideal mix of adventure, challenges, and excursions. You will witness the breathtaking views of the chain mountain peaks, along with the mesmerizing lakes, the plush verdant meadows, a dense jungle of pine and oak, and the scenic habitation sites.
Kedarkantha Trek Details:
Difficulty: Moderate (for beginners)
Kedarkantha Trail: Dense forests of Pine & Oak, open grasslands, and snow throughout winter.
Region: Uttarakhand
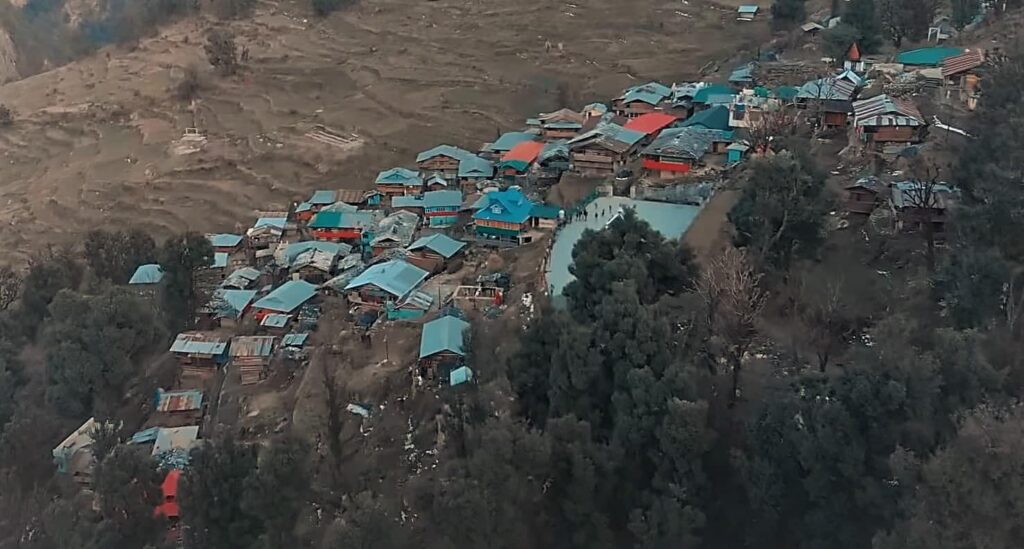
Base camp: Sankri (200 kms from Dehradun)
Kedarkantha Altitude: 6350 ft. in Sankri to 12,500 ft. Kedarkantha Peak
Kedarkantha Trek Distance: 23 Kilometer (Approx.)
Kedarkantha Trek Duration: 4 Days (Sankri – Sankri)
The Best Season of the Kedarkantha Trek: December to April
The actual Kedarkantha trek starts from a small yet beautiful town of Sankri in Uttarakhand at an altitude of 6350 ft (1935 m).
You will see wondrous snow-covered peaks and frozen lakes while passing through the snowy trails towards the Kedarkantha peak at an altitude of 12,500 ft. The dense oak and pine trees make it a picturesque site that you would love to capture for the memories of your lifetime.
You need 4 days to complete the Kedarkantha trek (from Sankri to Sankri). Also, consider 1 or 2 extra days from and to Dehradun as your journey starts and ends there.
What’s the Kedarkantha Story?
Mythological references anoint the whole of Uttarakhand and Kedarkantha is one of those divine places that keeps you motivated for the adventurous 23-kilometer hike.
The Mahabharata has a mention of Kedharkantha. As per the locals, the valley was the place where Lord Shiva was meditating when Pandavas found him and started building a temple around him. Till the time walls reach the Kanth (throat) of Shiva, a bull’s voice disturbed his meditation. So, to find peace, he moved towards the west (now Kedarnath)
You will see a Trishul of Shiva placed on a high top. Locals believe that it protects the valley and its people.
What’s the Best Time for Kedarkantha Trek?
As I mentioned in the beginning, you can cover Kedarkantha any time of the year. But trust me, if you really want the ultimate snowy experience while walking on the ice, winter is the time. Being one of the few chain hikes that you can finish in winter, the best time for the Kedarkantha trek is between December and April.
Don’t worry about the extreme temperature conditions, Kedarkantha is not very hard and even a beginner can also give it a try.
All Year Weather and Temperature Chart for Kedarkantha Trek
Month
Maximum Day Temperature
Minimum Night Temperature
Weather
May to June (Summer)
20°C
6°C
-No snow
-Hot mornings and cold evenings
-Mild rainfall by end of May
July to August (Monsoons)
17°C
4°C
-No snow
-Moderate to heavy rainfall with occasional landslides
-Cloudy and wet with green landscapes
September to November (Autumn)
15°C
2°C
-No snow
-Mild mornings and very cold evenings
-Mild rainfall until the end of September
December to February (Winter)
10°C
-8°C
-Fresh Snow and snowfall
-Mildly cold mornings & extremely cold nights
March to April (Spring)
12°C
0-5°C
-Residual snow
-Lush green forests and meadows
-Warm mornings and cold evenings
Kedarkantha Trek Itinerary
An Adventurous Journey
Day 0: Arrival in Dehradun
Day 1: Drive from Dehradun to Sankri Base Camp (8 hrs . Drive)
Day 2: Journey from Sankri to Juda Ka Talab (4 km. Approx 3-4 hrs.)
Day 3: Journey from Juda Ka Talab to Kedarkantha Base Camp (4 km. Approx 3-4 hrs.)
Day 4: Journey from Kedarkantha Base Camp to Kedarkantha Summit and return to Hargaon campsite (12 km. Approx 7-8 hrs.)
Day 5: Travel back from Hargaon to Sankri to Dehradun (8 hrs . Drive)
Also Read: Valley Of Flowers Trek [Uttarakhand] – A Complete Guide
Day 0: Arrival in Dehradun
Dehradun is the gateway toward Sankri. It is the capital of Uttarakhand and the connectivity with big cities like Delhi is very good.

Delhi to Dehradun
Distance: 250 km.
Duration: 7-8 hrs.
There are 3 different options to travel to Dehradun from Delhi
By Bus: You can take a bus from Delhi to Dehradun. There are several buses like Volvo, Deluxe, Semi-Deluxe, or UPSRTC which are easily accessible.
Cost: Starts from ₹400 per person
By Air: You can directly fly to Dehradun. Jolly Grant Airport connects it with many major Indian cities.
By Train: Many overnight trains are running from Delhi to Dehradun daily. You can choose BDTS HW EXP, YOGA EXPRESS, MUSSOORIE EXP, and more. They are more comfortable than buses and save your time.
Cost: Starts from ₹150 per person
Day 1: Dehradun to Sankri Base Camp
Start your journey from Dehradun to Sankri base camp early in the morning. If you leave Dehradun by 6 AM you can witness the beauty of sunset from this small yet stunning village. Reaching on time in Sankri will also give you the advantage of acclimating and preparing for the next morning trek. You will also get enough time to get some good rest before the trek.
Distance: 220 km.
Duration: 10 – 11 hrs.
Altitude: 6,400 feet
How to reach Sankri from Dehradun
The only option to reach Sankri from Dehradun is by road. You can take a bus, your private vehicle, or hire a cab/taxi.
By Bus: You have to take a bus from the Mussoorie Bustand (4 km away from ISBT). Only 2 buses are available from Dehradun to Sankri. One at 5 AM & another at 7 AM.
Cost: approx. ₹300 per ticket
If you miss the early morning buses, you can take connecting buses to the nearby villages of Purola or Hanol. Mini-buses or shared taxis are available towards Sankri from here.
By Private Vehicle: Once you reach Dehradun by your own vehicle, you can follow the route below to reach Sankri from Dehradun:
Dehradun – Purola – Mori – Naitwar – Sankri
By Cab: Many shared taxis run from Dehradun to Sankri. You can hire a shared one or a private taxi depending on our preference and the number of people in your group.
Cost: approx. ₹5000 – ₹6,000 per cab for up to 5 people
(*prices vary from time to time)
Day 2: Sankri to Juda Ka Talab

Distance: 5 km
Duration: 5 hours
Altitude: 9,100 feet
This is the first phase of your trek. It’s an approx. 5 km trail from the base camp. Passing through the thick oak & pine forests and green meadows takes you to the stunning Juda Ka Talab campsite. It’s a calm and peaceful frozen lake. Earlier there were 2 lakes but now they are fused into one.
Day 3: Juda Ka Talab to Kedarkantha Base Camp

Distance: 4 km
Duration: 3 hours
Altitude: 11,250 feet
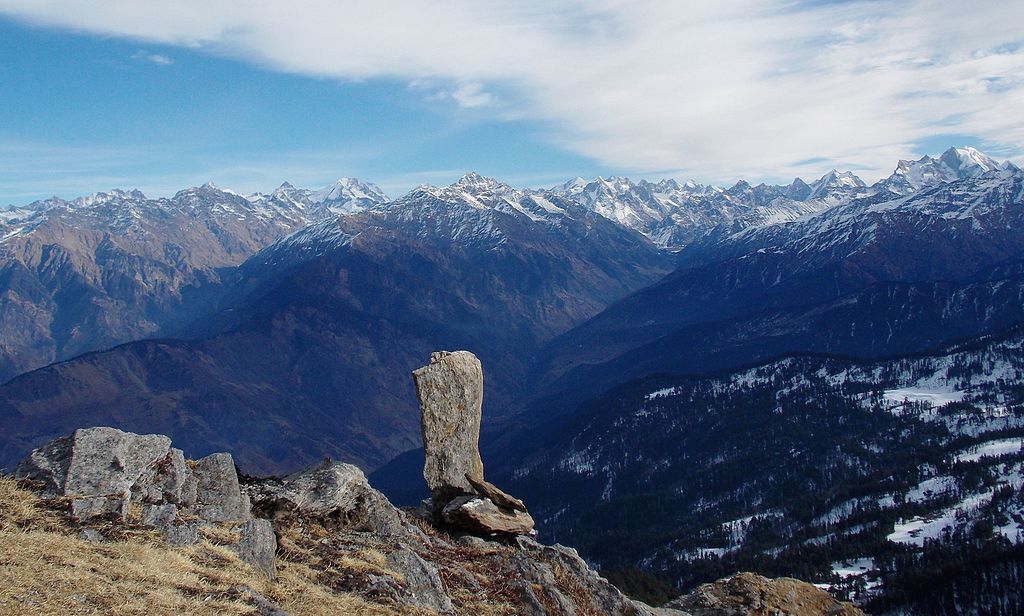
Leading from thick pine forests, a 4 km trek takes you from Juda Ka Talab to Kedarkantha base camp with some amazing open mountain views. Kedarkantha base camp is located at 11,150 feet. You will witness the snow-clad mountains’ beautiful panoramic views from here. Swargarohini, Ranglana, Bandarpoonch, and Kala Nag are some of the famous peaks visible from the site. Our destination, the Kedarkantha peak is also clearly visible from the base camp.
Day 4: Kedarkantha Base Camp to Kedarkantha Peak to Hargaon

Distance: 6 km
Duration: 6 – 7 hours
Altitude: 12,500 feet to 8,900 feet
The Kedarkantha summit is approx 2 hours away from the base. There are several routes to reach the peak which is marked by a Trishul (Trident) pointing to the sky. If you want to catch the mesmerizing sunrise (usually around 6:30 – 7 am) from the peak, I advise you to leave as early as possible (before dawn or 3 am).
As this is the final stretch towards the summit, the trail becomes a little challenging compared to the gradual ascend throughout the route. There are a few almost 80-degree inclines but trust me, they are worth the view your eyes going to experience after that.
Apart from the magnificent sunrise, you will get a 360-degree view of the Himalayan ranges including Chanshil Pass, Yamunotri, Gangotri, and Kinnaur Kailash ranges
After spending some amazing time on the top, it’s time to get back to the base camp. After reviving the energy, move further down towards the Hargaon campsite the same day.
Day 5: Hargaon to Sankri/Dehradun
Distance: 6 km
Duration: 4 hours
Altitude: 6,400 feet
This is the final route you will take by foot to reach the Sankri village. It’s a stone-paved route well marked and easy to cover. Also, as you are going downhill, it relatively takes less time. Along the way, the Har Ki Dun valley is also visible which is another famous trek. After 4-5 hours of trek, you will finally reach Sankri. Depending on your choice and the time, you can either head back to Dehradun or spend a day and experience the beauty of this Himalayan village.
Buses from Sankri to Dehradun are only available at 5 am & 7 am every day. It’s a 10-hour journey.
Stay Options during Kedarkantha Trek
At Sankri
You will get some decent but limited accommodation options in this remote village. Homestays, camps, and a few hotels are available. Homestays are a good option if you want to explore the true Himalayan lifestyle that too at a pocket-friendly price.
If you are going during the winter season (December to March), I recommend a prior booking before you go because this is the peak trekking season.
One major thing to consider is to carry enough cash with you as there are no ATMs or banks.
During Kedarkantha Trek
There are no hotels or homestays on your way towards Kedarkantha once you Sankri. There are various campsites available with camping and other essential facilities. If you have pre-booked your trek with an agency or trip organizer, they will take care of your accommodation alongside the trail.
You can also put up your own tent if you have camping experience. You can either rent out the essentials like tents, sleeping bags, etc., and buy food from Sankri or bring your own as there are no shops in between the trek.
Food selections throughout the Kedarkantha Trek
The best part of the Kedarkantha trek is that it is not very commercial like other tourist places. So, you won’t get restaurants and cafes around you. Apart from Sankri, you will see very few small tea homes where you can enjoy hot tea and Maggie. It can be difficult to find many food options.
I would recommend booking a package that includes food and accommodation so that you can relish the nature around you. Still, if you want to explore all by yourself, you must carry a portable stove and some foodstuff along with you.
Permits and Native Guide for the Kedarkantha Trek
To issue Kedarkantha trekking permits, Govind Vihar National Park authorities have enforced a mandatory rule that a local guide registered with the forest department must accompany you during the trek. The native guide can assist you with obtaining all the required permits from the forest office at Sankri.
So, hiring a local guide will lead you to the right path and ensure safety while sharing interesting stories and insights into the local region and culture throughout the trail. It will also help you in case of emergencies and other uncertainties that may come while on the trek. You must pre-book a guide if you are going in a peak season.
Cost of Local Guide: ₹1,000 per guide
Cost of Permits for Kedarkantha Trek: ₹50 per day
Things to Carry for the Kedarkantha Trek
You must carry a few essential items for a comfortable journey and a memorable experience on the Kedarkantha Trek. Also, if you are an experienced trekker and planning to attempt this trek all by yourself, you must carry additional items for camping and cooking.
Category
Item
Clothes
Windproof Jacket, T-shirts/shirts, trekking pants, Raincoat
Winter Wear
Minimum 4 to 5 layers of clothing is required during winters including thermals, woolen fleece jackets, caps, mufflers or neck warmers, gloves, and socks
Footwear
Hiking shoes, Crampons and Gaiters (Required during winters), Sandals or slippers
Toiletries
Sanitizer, liquid soap, toothpaste & brush, tissues, lip balm, sunscreen lotions
Electronics
Chargers and power banks
Camera with extra memory cards & batteries
Snacks
Glucose & ORS, biscuits, dry fruits, chocolates, energy bars
First Aid Kit
Band-aids, Dettol, bandage, Volini spray for sprains, Diamox for altitude sickness – an essential medication for headache, stomach upset, etc.
Miscellaneous
Water bottle/flask, sunglasses with UV protection,
ID & photocopies, cash,
trekking pole, headlamp torch
Things to Understand Before Trying the Kedarkantha Trek:
- Carry enough cash for your entire trek because there is no ATM or bank after Mori.
- There is no mobile signal available after Purola. However, BSNL has some reception in and around Sankri.
- Must pre-book your accommodation and guide if you are planning between November to January as this is the peak season.
- Pack only essentials and keep your bag light (under 10 kg recommended) because you have to carry it for the entire trek route.
- Train to Dehradun is the best option if coming from Delhi as it is comfortable and avoids delays.
- Keep yourself hydrated throughout the trek even when it is cold.
- You can either trek all by yourself (only advisable if you have some experience) along with your local guide or choose a trip organizer that takes people in groups and ensures the accommodation, food, and other formalities.
- Keep the Himalayas clean. Be a responsible traveler/trekker and don’t litter anything especially plastic and bring back any waste to dispose of properly.
I hope this guide has given you enough details about the Kedarkantha Trek. It’s a beautiful trek and you will enjoy every part of it. Don’t forget to share your experience with our community in the comments below. You can also share your amazing travel stories on Crazy Wanders and get a chance to win an Amazon gift voucher worth ₹500. Read more here.
If you want to learn more about this trek, you can ping me on WhatsApp and I would love to guide you > https://wa.me/qr/NLJXZYE4CGCDB1
